If you have leather or vinyl/PVC skates, you can paint your skates after preparing them appropriately! Preparing your skates before painting them allows for maximum paint absorption, and a longer-lasting paint job.
Regardless of your skate boot material, be sure to cover up all hardware, boot soles, and non-leather surfaces with with painter’s tape and paper towels/cardboard before moving on to the next steps.
Preparing Leather Skates
- Deglaze your skates. Rub Angelus Leather Preparer&Deglazer (or acetone) generously over the boot leather with cotton balls or a rag. Let it dry for 15 minutes. Perform this step in a well-ventilated area, and wear gloves. I’d recommend even wearing a respirator.
- And you’re good to go!
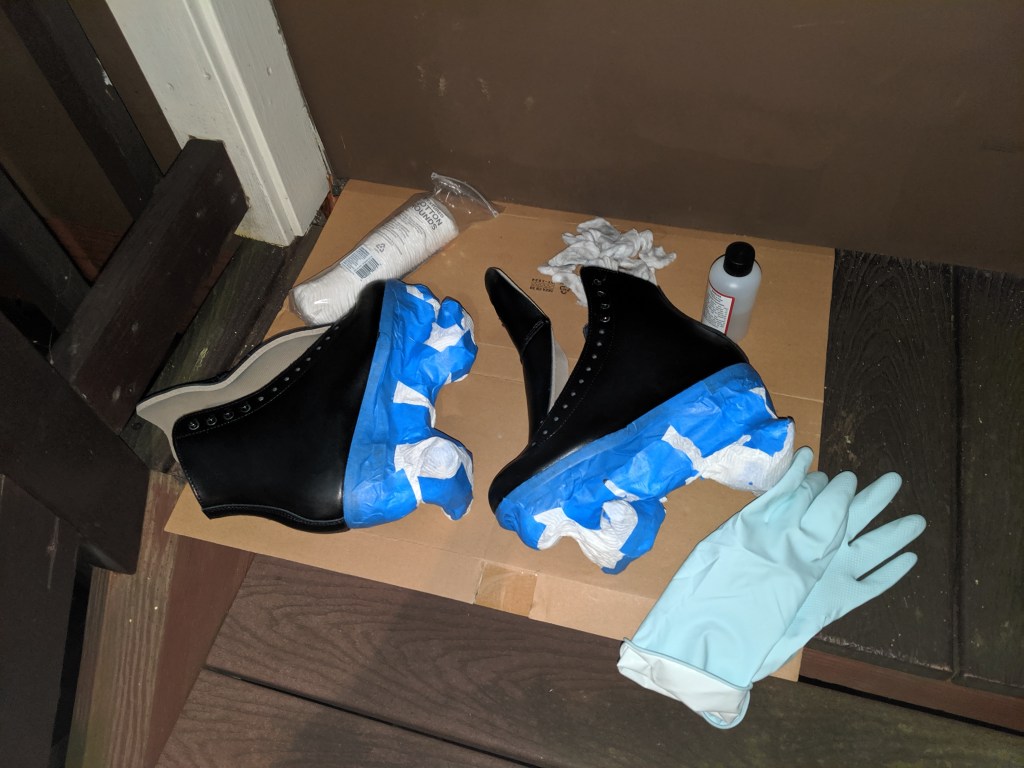
Deglazing black leather skates 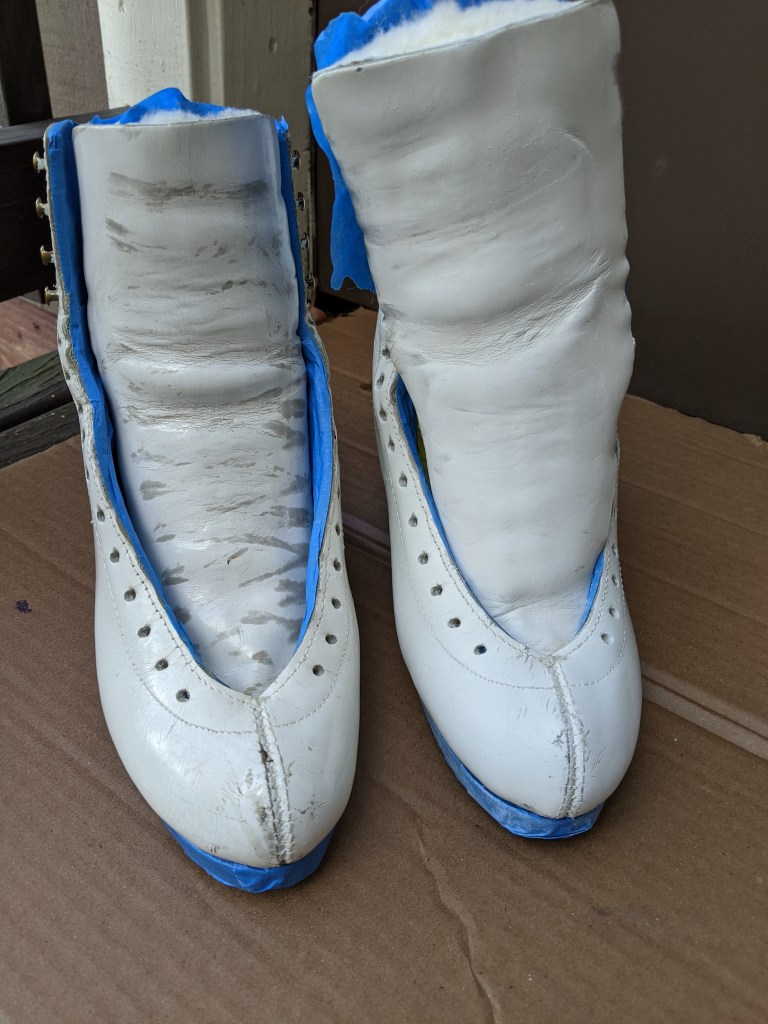
Deglazing used white leather skates.
Left: Factory finish. Right: Deglazed.
Preparing Vinyl/PVC/Vegan Leather Skates
Disclaimer: I have not yet tested this method and I will be updating this post after I test this method in the upcoming weeks.
- Deglaze your skates. (See above)
- Sand your skates with fine grade sand paper. Fine grain sand paper will create microscopic grooves for the paint to adhere to. I plan to sand mine with 400 grit, then 800 grit, and finally 1500 grit.
- Apply an adhesion promoter. I plan to use KleanStrip Bulldog Adhesion Promoter. You must start painting your skates immediately after applying adhesion promoter. Perform this step in a well ventilated area. I’d recommend even wearing a respirator.

My boots are ready to paint! Now what?
I highly recommend Angelus leather paints. (Yes, you can use these on PVC/Vinyl too!) Apply paint with a paint brush or an airbrush. If you’re interested in airbrushing your skates, but don’t want to buy an expensive airbrush rig, Preval spray guns are a great, cheap option. When applying Angelus leather paints with an airbrush or spray gun, make sure to add some Angelus 2-Thin to the paint to thin it out and allow it to spray more easily.
Apply very thin layers of paint when painting your boots. Allow each layer to fully dry between applications. You can use a hair dryer or heat gun to dry them quickly between applications. Many thin layers will serve you better than one thick one. Thin layers allows for maximum flexibility, which will result in less cracking in the future (or, hopefully, none).
Not sure what color you want to paint your skates? Check out my guides on how to paint them oil slick or holographic.
When you’re done painting, apply Angelus Finisher for a protective top coat. Just as with the paint, apply several thin layers of Finisher. Allowing each layer to dry fully before applying the next. Allow the boots to sit for 48 hours, and enjoy!
Disclaimer: No matter how well you paint your skates, painted skates will be prone to scuffing and scraping. But hey, if you paint them yourself… at least it’ll be able to touch up later, right? 🙂
What About Suede Skates?
If you’d like to change the color of your suede skates completely, I’d recommend dying them. Angelus has many colors of suede dyes to choose from. There are lots of great videos on Youtube on how to dye suede roller skate boots.
If you’d like to paint on a few small details, I’ve seen some beautiful detail work painted onto suede skates, but can’t speak to the longevity. For example, check out these beautiful examples from @986_____ and @skate_or_dye_customs.
If you’re buying skates with the intention of painting them, I’d recommend buying PVC/vinyl or leather skates instead of suede skates, as the smooth surface will be easier to paint.

Thanks for posting!!
Can’t wait to see your results with vegan leather!!
LikeLike